| Cleanup (issue: Copyedit—esp. grammar and punct.—and neutral tone) This article may require cleanup to meet Monday Night Combat Wiki's quality standards. Please improve the article if you can. |
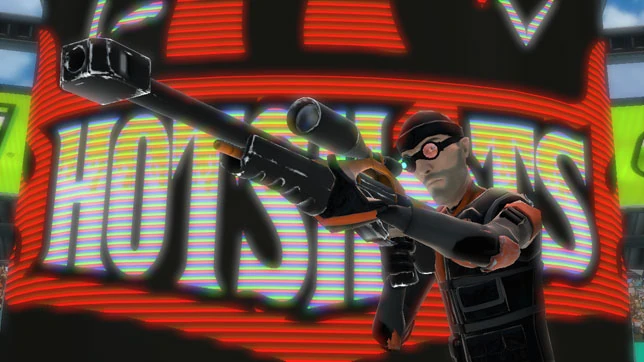
The Monday Night Combat Sniper.
General[]
The Sniper is obviously based for long range combat. The main asset of the Sniper is to keep areas secure within a certain Arena. Everyone hates Snipers, even other Snipers hate Snipers, and they generally like to stay out of the sights of the Sniper. Be cause of this, Snipers can get great control of the game, even when they aren't getting kills. Snipers are excellent crowd controllers, their Flak can do alot of damage in a certain area and can make a temporary wall for escaping; the Traps skill can freeze many opposing Bots and Pros in their tracks and make them sitting ducks for oncomming fire; the Piercing and Explosive rounds from the Sniper Rifle can cause massive collateral damage to anything it touches. On top of all this, the Sniper can get Juice faster than any other class in the game. Exploiting this can lead to a near easy victory in almost every game you play.
Game modes[]
Blitz[]
Sudden Death Strategy[]
This is a fool proof strategy that requires two players, a Sniper and a Tank. If you folow this strategy correctly, you can get up to round 100 with ease.
Skill Preperation[]
Sniper[]
At the beginning, the Sniper should upgrade his passive skill to level three to hit multiple bots with penetration and explosive bullets and later on in the game, has his Flak skill at level 3 and his Traps skill at least at 2. His red Grapple skill should stick at one, since grappling is unconventional in Blitz, even against Jackbots because you'll have to use the anniahlator when multiple Jackbots make their appearance.
Tank[]
Upgrade Product Grenade to it's highest at the start, passive skill at level two and Charge at level three. Deploy at Level 3 when taking on multiple Jackbots if they hit they hit an intersection due to regenerative ammo (should also have juice ready for maximum efficiency).
Round 1-10[]
This is a fairly easy round that takes little to no effort to beat. Most bots can get destroyed easy in one to two shots of the Sniper Rifle, one Death Spin by the Tank or a melee attack (click the right stick). Skills should be leveled up as quick as possible during this time. Both Pros should be on the ground floor and not on the elevated platforms. The reason for this is to exploit the Sniper's piercing shots and to put the Tank in its close range combat environment. Buying and upgrading turrets should be done, only in the lightest of situations (i.e. after Bulleye's death, Slim rounds,) unless it's an emergency. Jackbots should be no problem here.
Round 11-20[]
Things start getting harder here as the bots now spawn at the sides of the arena. Because of this, the Sniper and the Tank can no longer both cover the front. Have the Tank cover the Sniper from the bots coming from the sides while the Sniper kills all the bots from the front. Turrets should be brought up at this time; build RockIts on the sides of the arena first (or wherever you can't cover) before building them in the front or back of the arena. Get a single Shaveice turret in the middle front of the arena, to slow down any bots the Sniper can't kill quickly enough. Long Shots should only be built at the back corners of the arena, as no other turret can hit the bots back there. Everywhere else should have only RockIt turrets, don't substitute anything for a lazer blazer, as they don't have the long lasting-ness of a RockIt.
Round 21-30[]
By now, you should have the apropriate skills and turrets placed now. This is where things really pick up and the danger of losing your turrets are even greater. Keep upgrading your turrets as you go along, starting with the turrets that are covering areass your not. Keep sticking with the formation you have for the Pros, only the Sniper will have to sometimes switch his view to the bots not coming from the front, as the Tank will have a harder time keep up. Bots here can't be killed in one shot so you'll have to weaken them by other means before you can use your more powerful attacks. At this stage of the fighting, you may have to start using the Ejector and Annihilator. Only use the Ejectors where the switches are at the bottom of the arena and not on the elevated platforms, as you the Moneyball may take damage from the time you get to the Ejector. The Annihilator should only be used when the Jackbots apear. And Jackbots will come in higher numbers.
Round 31-40[]
You have now won the Protag "Iron Man"
The bots are now getting faster in addition to their strength, and will prove more difficult to kill. Skills like Traps and Product Grenade are going to be used more frequently now. Keep with your strategy, using Ejectors much more often and upgrading and rebuilding lost turrets.
Round 41-60[]
What you should watch out for now, is the fact that the pattern of bots changes now, making it harder to predict when to use hazards at the right time. You may also have enough money to spend on the Juice vendors (the Spunky Cola advertisements,) and not end up losing to much to keep up with your turrets.
Round 61+[]
If your Moneyball hasn't taken damage yet, your doing this right. If it has however (which shouldn't be a surprise if you made it this far,) don't change your tactics keep with what your doing; having both Pros on the ground, the Sniper headshooting Bots and the Tank Deathspinning everything in site. Annihilator on the Jackbots and Ejectors on the smaller ones. You will now be getting surprise Jackbot waves before the Annihilator is ready, so keep your wits about you. Things actually start getting easier here because past Round 60 the Bots stop getting more powerful and more predictable Bot spawn patterns are present. Just be careful though, as a single Jackbot wave can wipeout the entire arena of eveything in a matter of seconds, to say nothing of two or three (which can occur if you're unlucky). But now that the goal has been reached, you may just want that to happen, as you have been playing for hours on end just to get the highscore. Give yourself (and your friend) a pat on the back. You've shown you can play this all day.
Crossfire[]
Early game[]
- The best two skills to upgrade are Grapple and Traps if you plan on playing offensively. If you are playing a specific map like Ammo Mule and Grenade III, you can spend money on turrets and defend the base until you get as much cash as you need.
- If you're planning to play defensively, upgrade your Traps and Passive skills to level 2 first, you'll be able to defend which spot you're camping at with more ease. Not only will you be able to get multiple shots on Bots, you will be able to counter Assassins with a little frozen goodness and get easier headshots on them.
Mid game[]
- By Mid-Game, all your skills should be at least level 2 to be of any use. No matter what position you're being, upgrade your Passive Skill to level 3 as quick as possible. Even if your other skills remain at level 2, a level 3 Sniper is always the best at either offence or deffence, and makes them better at crowd control. Be more cautious during the Mid-Game, Assassins, Assaults and other Pros will be able to avoid your Traps better and be able to counter your other abilities. Camping also becomes more difficult in the later game stages as more gamers will become aware of your strategy and kill you more often. A common Sniper strategy in various video games and even in real life is to never snipe in the same place. This means, change your location every few minutes; be more aggresive on the field; camp ridiculously close to the enemy base; and using Traps and Flak in nonconventional places (i.e. setting a trap on the Annihilator and sniping the Pro before he/she uses it.)
Attacking a Money Ball[]
When Snipers attack the Money Ball, they usually Juice Rush it. However, a proficient Sniper can do as much, if not more damage without Juice than other Pros.
With Juice[]
Juice rushing is very common in Monday Night Combat, even more so with Snipers, as they ususally get more Juice than any other class in the game. When Juice Rushing, throw Flak at the Money Ball to damage it and surrounding Pros (don't worry about your Flak doing damage to you.) Go close range to the Money Ball with your Sniper Rifle (your SMG wont do enough damage) and scope into it (as not scoping in does less damage.) Circle around the Money Ball and keep shooting it for massive damage. If you have exploding shots, you may also kill enemy Pros trying to kill you before you do too much damage on their Money Ball. When you run out of Juice, keep shooting, you may not do as much damage but your most likely going to die anyway because you're in the other team's base.
Without Juice[]
Attempting to attack the Money Ball without Juice can prove quite the challenge. The strategy here is teamwork. When your other team mates are attacking the Money Ball on one side, flank to the other side and attack. Make sure there is no one on the side your going through first, as it could prove to be a quick death. When attacking on the other side, use your skills to make it a nightmare for the defending team. Use Flak as crowd control to force them into hiding or cause massive damage; and use Traps, not to cover yourself but to cover the team mates closer to the Money Ball, as it will give them an easier time doing damage. When all else fails, and the Money Ball still has at least more than 25% health, focus on killing the opposing team and making sure they don't get close to your Money Ball.
Defending the Money Ball[]
With the Sniper's ability to crowd control, it may be easier to defend the Money Ball than with most classes. If your team's Money Ball is under attack by the opposing team, stay on the elevated platform where you spawn and keep throwing as much Flak and Traps as you can. Switch to your SMG as sniping at close range from the platform will prove difficult, unless your attacking a deployed Tank or Gunner. If someone is frozen by a Trap, and your Grapple is at least level 2, you can attempt to ring the Pro out. Be careful though, as you only have so much time to position yourself between the target Pro and the edge of the arena, and failing to Grapple can have deadly consequences. Immediately get on the offence when the threat has been repelled to take the fight to them.
Weapons[]
Sniper Rifle[]
Always, always aim for the head. If you go for bodyshots then the enemy Pro will quickly realize what's happening and get to cover. A useful endorsement for the Sniper Rifle is Rate Of Fire, which makes it easier to get bodyshot kills. Rate Of Fire combined with the Sniper's Passive level 3 Explosive Rounds can kill Bots, turrets and Pros very quickly. The Sniper Rifle is also the best weapon for maxing your Juice meter.
SMG[]
The SMG has a high rate of fire, low accuracy and a generally low clip, but can still be effective when used properly. Obviously, Clip Size is a must if you can't stand reloads. Also if you want to do more damage then you should go with Rate Of Fire. The SMG should only be used in close counters, or when you need to suppress the enemy when making an escape.
Skills[]
Flak[]
Flak is the Sniper's primary tool for crowd control, most Pros generally avoid the Flak field as they don't want to lose more health than neccesary. Due to this, you can pretty much make anyone go where you want them to by throwing an orb of massive hurt in their direction (but this takes alot of practice.) It can get Supports away from their Firebases and cause Gunners to unDeploy and lose their defences (or they can just sit there and die slowly.) It is also a great tool for escaping the enemy's clutches. Throwing a Flak when they're chasing you can either force them to back off, or cause them pain, making it easier to pick them off. When paired with Traps, you can get major Flak kills as the enemy Pro wont be able to get away from the punishment, just by throwing Flak where the Pro is frozen.
Traps[]
The Traps skill is the most used skill for the Sniper. Traps are meant to freeze and slow down enemies to gain a defensive edge. The primary strategy for the Traps is camping and tricking enemies to setting themselves up for easy kills. You can have as many Traps set at once as your current Traps skill level (up to three when fully upgraded), so you have to plan out where you want them. If you're playing a defensive position, or you're planning on camping, this is a major skill for your role.
Sniper Grapple[]
The Sniper Grapple is one of the most deadly grapples in the game. It can kill the lighter classes, and Ring Out the bigger ones at level 2 alone. It also knocks the enemy the most distance away out of any Grapple in the game, so there is a low chance of retaliation unlike other grapples.
A neat trick with grapples (can be done with all grapples, not just the Sniper's,) is that there is a way to change the weapon that you are using while doing the grapple. This is useful because you can use a more effective weapon after you do the grapple. To do this, you must hit LB to switch weapons and Grapple at about the same time. If you are using the Sniper's SMG and do this trick, and the opponent hits a wall you can use the Sniper Rifle to finish them off (Will soon be patched.)
Endorsements[]
- See Sniper Custom Classes for user-submitted Endorsement choices.
Juice[]
The Sniper can get Juice faster than any other Pro in the game. Due to the Sniper's piercing and exploding rounds; hitting many things at once, added to the damage done by one Sniper Rifle shot alone getting significant juice, you may end up Juicing every two minutes in a round. Because of this, you want to exploit it. Don't save it for an emergency, otherwise you may end up getting assassinated befroe you get the chance to Juice.
Arenas[]
AmmoMule Arena[]
AmmoMule is considered the most hated arena in the Monday Night Combat. Because of it's relatively small size and great ease to move anywhere on this arena, one may think it's a Sniper nightmare. On the contrary, since the Snipers main strength is crowd control, a proficient Sniper can control almost an entire half of this arena (which is saying a greater deal than usual.) The center of the arena you can be controlled through the use of skills like Flak and Traps, the left and right sides can be controlled through camping on one of the elevated platforms (or more accurately, bridges,) the tiny underground portion can be controlled easily, because no one ever goes down there and the base can be easily defended; as you can cover all sides.
GrenADE III Arena[]
Grenade III is an amazing arena for the Sniper. You can attack Pros and Bots directly from your base with great ease. You can even set up Traps on the center platform from this area, and snipe unsuspecting Pros who are trying to use the Annihilator. Just about any area here can be used as an effective camping spot (depending on how good you are.) Be careful for Assassins though, as they are very akin to this map as well for it's large area. But as long as you use Traps efficiently you should be good.
LaseRazor Arena[]
Being a sort of "maze" like Arena, Lazor Razor is not the best map for Snipers. When it comes to covering an area, in most cases you may only get one strip, and that's for killing Bots. There is alot of different ways for people to duck away from your shots and getting flanked and outnumbered can be a nightmare. On the other hand, if your playing offence, your going to become a massive pain in the ass for the other team. Spamming Flak, Traps, mowing down the opposing team's Bots and being able to get away with it at the same time can really put an advantage on your team.
Steel Peel Arena[]
The best map for Snipers, hands down. A wide open map with the Pros behaviors being easily tracked can serve a great deal for the Sniper, as he's all about easy headshots and controlling the environment. You can practically snipe anywhere possible, the base is easy to defend (and attack,) setting Traps on the elevated platforms are almost unaviodable and the enemy turrets can be destroyed with ease (your turrets can be destroyed just as quickly if there is another Sniper on the opposing team.) Flanking however, is and always will be a Snipers worst nightmare and can easily be done in this arena. A good camp must be made to perfection if you have any hope of survival. Also, if there's another Sniper on the opposing team, your main conflict will be with said Sniper, and prove all your other plans to be more challenging.
| ||||||||||||||